
4.29.2010
Garden Installation
4.27.2010
Chasing Fairies
 It's spring mushroom hunting season. Last Friday on the way home from work I drove past the park and in a flash noticed some rings of tall grass growing in the park. I knew right away from my scattered mycological experiences that these were fairy rings, which, according to my dusty copy of Common Edible Mushrooms by Clyde M. Christensen, were once thought to mark the path of dancing fairies. What a lovely thought! They are formed when a few spores of the fairy-ring mushrooms fall upon a favorable place and begin to grow. I really wanted to snap a picture of these perfectly circular rings so Vera and I set out with the stroller this morning to look for them. This required a bit of off-roading with the buggy; after much backtracking we found nothing. It was like they disappeared as quickly as they showed themselves. Must be another spring ephemeral like spring beauties and trout lillies. The picture here is one from the web.
 But have no fear, our morning walk still proved to be interesting. Instead of chasing fairies I, for a moment, almost thought I was going to be chased by an urban coyote. We were strolling through the seminary grounds and in the distance in a clearing I could see what looked like some sort of wild animal. At first glance it appeared to be a bobcat or a dog. It was standing very still as if ready to pounce. I couldn't believe what I thought I was seeing. I didn't think coyotes showed themselves much in the daytime. I was a bit nervous about it so I clapped my hands a few times as I peered at it through the bushes. No movement. So we pressed on deciding not to try disrupting it. As I came around a bend another "coyote" was just yards from me. It was then that I realized these were some sort of taxidermy decoys most likely placed there to scare the real coyotes that I've seen trotting around the grounds and up the street in the wee hours on my way to work on Fridays at dawn. We were so glad to learn they were fakes though it still made me shudder.
 I've been working outside for the past week at least to get our new raised beds installed, remove any excess grass in the new walkways, and replace the brick edging. It's been quite a project, but I know it will be rewarding when I'm able to grow more veggies this year. I was looking at the backyard from an upstairs window and feeling so lucky that I have this palette to work with everyday of the growing season. It's so therapeutic.
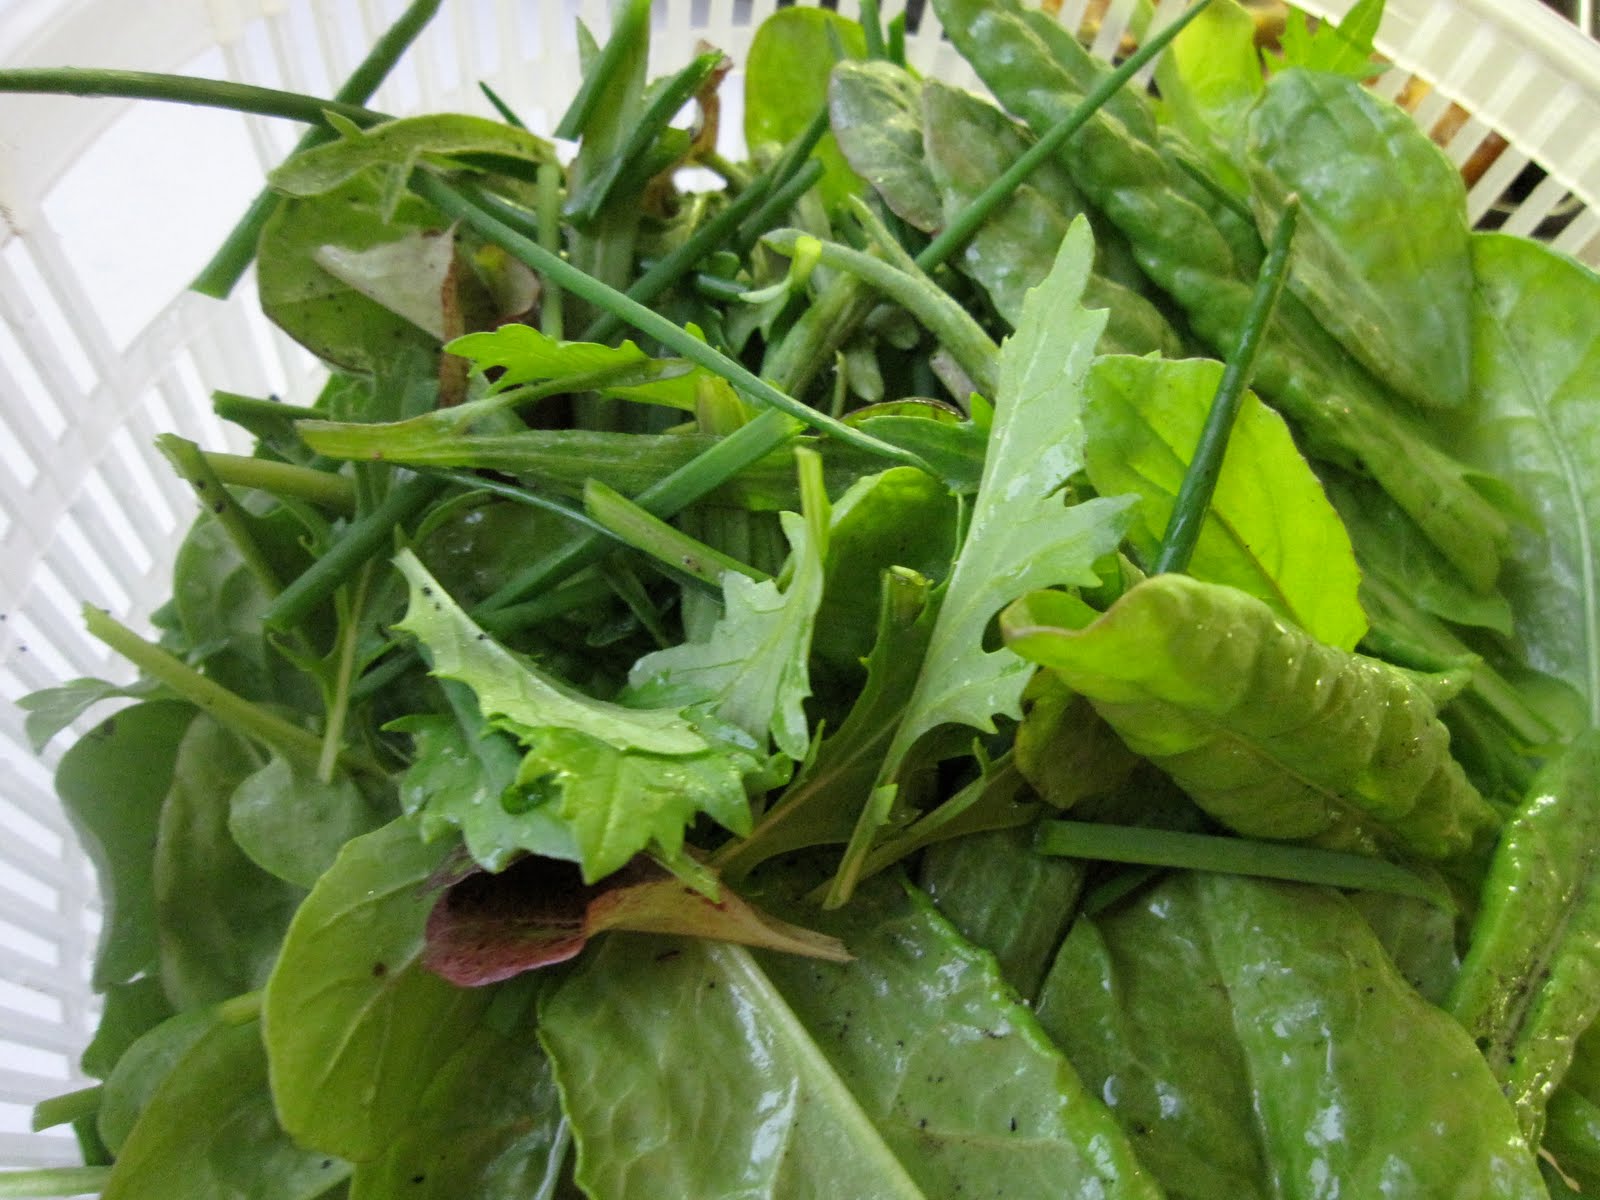
Sunday we continued the Sunday dinner tradition started last fall by hosting some Chicago friends for lunch. We enjoyed the first real green salad from our garden. We cut sorrel aplenty, but I was able to complement it with enough baby greens, mesclun mix, and herbs to serve at least a small bowl for each guest. There's always so much hope in that first bite.
Last night was my first Transition Milwaukee meeting at the Urban Ecology Center. I'd wanted to join since I first heard about the group over a year ago, but wasn't able to manage the commitment with my own to Vera and her feeding needs. Since that has gotten a bit easier I've been able to get out a little more. It was wonderful to be in a room with so many like-minded people working towards a sustainable, alternative, post-carbon community. There were many familiar faces and many I had never seen. It's great to know there are all these people out there striving towards to the same goals and we've never met until now.
And, of course, I won't leave you without a new recipe. As a baker with a science background I'm not usually one to suggest tampering with a baking recipe. In fact, the precision of baking is what drew me to the field of pastries in the first place--it brought together my love of food, my sweet tooth, and countless semesters of chemistry (not to mention the hours are more reasonable than the average restaurant cook's schedule.) But I have been experimenting lately with "bean-nut butter," a higher fiber substitute for straight peanut butter made of cooked garbanzos and peanut butter. In baking it can be directly substituted to give your recipes even more bang for your buck. I've adapted this recipe to be egg-free, dairy free, gluten-free, and delicious.
Bean-nut Butter Banana Chocolate Chip Muffins
Makes about 1 dozen
3 ripe bananas (can use frozen bananas)
 3 T. flax meal
3 T. water
1/2 c. sucanat
1/2 c. bean-nut butter (see recipe below)
1 3/4 c. rice flour (could also use garbanzo or coconut flour)
2 t. baking powder
1 t. baking soda
1/3 c. melted coconut oil
1/2 c. rice or almond milk
1/2 c. chocolate chips (can be dairy-free if you choose)
Preheat oven to 350 degrees. Mix first 5 ingredients in a food processor. Blend for 1 minute. Combine dry ingredients in a mixing bowl. When thoroughly mixed, add to food processor along with coconut oil and milk. Blend well. Add the chocolate chips and pulse once or twice. Ladle the batter into a greased muffin pan, filling each hole to the top. Bake for 15-18 min. or until muffins are firm to the touch. Cool and serve. These also freeze well.
Bean-nut Butter
Makes 3 c.
2 c. cooked garbanzo beans
3/4 c. peanut butter
1/4 c. hot water
Mix all ingredients in the food processor until smooth. Store in the fridge if you plan to use in a few days or freeze in cubes to thaw for later use.
4.21.2010
Spring Foods
I'm always in search of more spring recipes. The pickin's in our garden are few and far between, but that doesn't mean I can't cook something with our meager harvest. Every season I find myself backed up with sorrel, the lemony perennial "herb" that is oh so prolific. It's best used fresh because it turns a drab green when exposed to heat so I usually prepare it as a cold soup or tossed with salad greens, but I tried a cooked recipe again last night and was happy with the results. The sorrel was mixed with enough other ingredients that the color wasn't so pronounced in the final dish. I also incorporated chives and peas--wonderful spring ingredients. Peas aren't quite here yet so you may want to save this recipe for later in the spring.
Sorrel and Pea Frittata with Chicken and Herbs
Serves 4-6
Adapted from Verdura, Vegetables Italian Style by Viana La Place
2 T. unsalted butter
 1 onion, peeled and finely diced
6 eggs
1/2 c. heavy cream
2 c. sorrel, washed and chopped
2 T. fresh chives, chopped
1/4 c. frozen shelled peas, thawed
2 T. basil pesto (frozen from last season's harvest)
1/2 c. cooked, diced chicken breast (leftovers are great)
2 T. freshly grated Parmesan
1 T. bread crumbs
1 t. salt
1/2 t. freshly ground pepper
2 T. extra virgin olive oil
Preheat oven to 400 degrees. Melt the butter in a medium saute pan over low heat, cook onions until they are soft. Set aside. In the meantime, break the eggs into a bowl, add the cream, and whisk until well-combined. Add the sorrel, chives, peas, pesto, chicken, onions, Parmesan, and bread crumbs. Season with salt and pepper. Stir the mixture well. Place the olive oil in a large ovenproof skillet and turn the heat to medium high. Swirl the oil in the pan to coat the sides and bottom. Add the egg mixture and lower the heat. Cook the frittata slowly, stirring until large curds form. Stop stirring and cook until the frittata is firm except for the top. To cook the top, place under the broiler in the preheated oven. Cook until firm and lightly golden. Watch it carefully since overcooking will toughen the eggs. Remove the frittata from the oven and let cool for a few moments in the pan. Place a plate over the top of the pan and invert the frittata onto it. Serve warm or at room temp. with a simple tossed salad.
I've been checking our asparagus patch just about every day lately. I'm excited for the first harvest. Finally! Asparagus should not be harvested until the third year. The first couple of seasons it will produce skinny stalks that should be allowed to go to seed. It's hard to believe these three years have passed so quickly. I was a bit nervous about the asparagus this morning when I still didn't see any signs of life. It was one of those times when my garden journal came in very handy. I consulted last year's notes, which told me that it suddenly popped out of the ground on May 2. And, if I recall, it grew literally inches by the day after that.
4.18.2010
Bringing Nature Home


I love being outdoors and am constantly collecting bits of nature to bring inside. I feel it helps bridge the gap between the two realms. I've enjoyed discovering uses for the cherry branches we pruned from the tree last week. I have some of them in one of my grandmother's vases in the dining room; they're blossoming and have made me quite cheerful at the breakfast table in the morning. Today when Vera and I were out for an early morning walk, scoping out the lakefront path where we did so much wild foraging last year, I found an interesting piece of "driftwood" that I packed into the stroller and brought home. It will make a cool centerpiece for our outdoor table this summer. As I was studying it, I thought of other bits of nature in our home and have photographed them here.


 Today was the first rhubarb harvest. So far the stalks are fairly short, but from my experience the more I pull the sooner the rest will come in bigger and stronger. These plants have really shot up in the last couple of weeks. Looks like we'll have lots of "pie plant" to freeze for the winter. This harvest will mostly likely be eaten fresh, perhaps in a quickbread this week.
 I wanted to share a new recipe with which I experimented last night in preparing dinner for a weekend house guest. Ben and I love smoked trout and are always looking for new ways to enjoy it. This recipe was also a good way to use some of the spring goodies popping up in the garden.
Smoked Trout Pasta Cakes with Sorrel Mayonnaise
Makes about 8 cakes
This is a great way to use leftover pasta. I had some cooked and frozen from an event I catered a few weeks ago. This was a great way to use it because the texture after thawing didn't matter so much.

1 c. cooked spaghetti or linguine
2 beaten eggs
2 oz. fresh chives, minced
1/4 c. fine dry breadcrumbs
2 T. chopped sorrel
1 t. dried hot pepper (optional)
2 t. olive oil
1/4 t. salt
1/4 t. pepper
1 recipe Sorrel Mayonnaise
grapeseed oil for pan-frying
Cut the cooked spaghetti into 1-inch pieces and set aside with the smoked trout. In a large mixing bowl, combine the eggs, chives, bread crumbs, sorrel, hot pepper, olive oil, salt and pepper. Add the smoked trout and pasta. Shape into 1/2-inch thick patties by hand or with a round cutter and freeze briefly on a cookie sheet so they hold together better when frying. Heat a large heavy skillet, add and heat 2-3 T. grapeseed oil. Over medium heat, cook the patties, a few at a time (do not crowd the pan), about 3 min. on each side or till golden brown. Drain on paper towels. Keep warm. Serve with Sorrel Mayonnaise.
Homemade Sorrel Mayonnaise
Makes about 1 cup
You can substitute any herb for the sorrel--I would suggest trying cilantro if you're making this in the summer. Usually mayonnaise is made with only yolks, but this recipe uses both yolk and white so you don't have to worry about using the white somehow. You could make it without the whites as well.
1 organic, farm fresh egg at room temperature
2 T. red wine vinegar at room temperature
1/2 t. salt
1/2 t. dry mustard
1 c. sunflower, olive, or grapeseed oil at room temperature
Place raw egg, vinegar, salt, and dry mustard in a food processor and add 1 T. oil. Process, then add remaining oil via the feed tube (see note) in a slow steady stream. Process until thick. Add additional seasoning, if needed.
Note: I recently learned, via the book Julie and Julia, that the tiny hole in the bottom of the piece that fits into the feed tube is specifically for making mayonnaise. Pour all the oil into this part and it will gradually drip out in a perfectly slow stream.
4.15.2010
Confrontation in the Garden
Something nasty went down in our yard last night. I went out to hang the first load of laundry at about 6:30 AM and came back in saying to Ben, "there's a half a squirrel laying out there." I usually like gross stuff, I think I've mentioned my morbid curiosity, but this was much more gruesome than the occasional dead bird I've buried. It looked like this rodent had been force-fed dirt (the stomach seemed full of it), decapitated, then cut in half from head to toe. All I could see was one arm, one foot, the tail, and this ugly dirt-filled body. Okay, so I was morbidly curious, but really I didn't get close...for too long. There was also a 4-inch hole among the seeded rows in the raised bed and lots of squirrel hair around it. Though I've been watching a lot of Law and Order lately, I was not able to put any forensics or investigative skills to use to figure out what the heck happened. My only guess is a fox or raccoon. Uuuugh! On his way out the door to work Ben scooped up this mess with a shovel and disposed of it. Vera and I watched in horror from the upstairs window. On to more pleasant things...
 So just because I like dirt doesn't mean I can't also be interested in fashion. As long as I can remember I've been interested in fashion, not from a trendy, consumptive point of view, but from an artistic standpoint. I used to dream of being a designer--one of my favorite toys was "Fashion Plates" and my sister and I used to hand draw our own catalogs as if we were destined to work for J. Peterman. Now I have fun clipping designs from catalogs or magazines that accidently end up in my mailbox (like Anthropologie) and saving them in a binder of sewing ideas. A lot times I get ideas from things I think I see. And I love finding thrifted pieces and putting together outfits just like what I see in the fashion mags. So does anyone remember Units, the clothing retailer in the 1980s that sold solid colored individual pieces that could all be mixed and matched? I'm thinking of bringing back that idea. Seems like it would be economical these days to have a handful of classic pieces that could all be interchanged. So the piece that I would reinvent is the simple tube that could be worn as a skirt, tube top, dress, cowl neck, hood, etc. I found a few pieces of continuous ribbing in my last fabric thrifting trip and have been experimenting with how to wear them. Humor me here with my funny pictures (this may have been the highlight of my day at home as a mom.) I'm "modeling" a cowl scarf, a hip hugger (for wearing with leggings under a too short top--good for those of us moms with a little belly bump left), a headband, and a scarf/hood for the days you want to go incognito or look like Kate Hepburn. Have fun!


 So just because I like dirt doesn't mean I can't also be interested in fashion. As long as I can remember I've been interested in fashion, not from a trendy, consumptive point of view, but from an artistic standpoint. I used to dream of being a designer--one of my favorite toys was "Fashion Plates" and my sister and I used to hand draw our own catalogs as if we were destined to work for J. Peterman. Now I have fun clipping designs from catalogs or magazines that accidently end up in my mailbox (like Anthropologie) and saving them in a binder of sewing ideas. A lot times I get ideas from things I think I see. And I love finding thrifted pieces and putting together outfits just like what I see in the fashion mags. So does anyone remember Units, the clothing retailer in the 1980s that sold solid colored individual pieces that could all be mixed and matched? I'm thinking of bringing back that idea. Seems like it would be economical these days to have a handful of classic pieces that could all be interchanged. So the piece that I would reinvent is the simple tube that could be worn as a skirt, tube top, dress, cowl neck, hood, etc. I found a few pieces of continuous ribbing in my last fabric thrifting trip and have been experimenting with how to wear them. Humor me here with my funny pictures (this may have been the highlight of my day at home as a mom.) I'm "modeling" a cowl scarf, a hip hugger (for wearing with leggings under a too short top--good for those of us moms with a little belly bump left), a headband, and a scarf/hood for the days you want to go incognito or look like Kate Hepburn. Have fun!


This week has been busy with food and environment related events. Tuesday night I attended a Raw Food and Digestion class at Future Green, Wednesday night I attended the monthly Friends of Real food potluck and program at the Urban Ecology Center where we heard Venice Williams speak about the new plans for Alice's Garden, tonight I'm going to see No Impact Man at our church, and tomorrow night I'm going back to the Urban Ecology Center to hear Bill McKibben speak about his new book, Eaarth. It has felt great to get out this week and see a lot of like-minded friends and colleagues. In a way, it feels like I'm finally crawling out of the isolation I've been in since giving birth last year. This summer will be good for a lot more of that.
4.12.2010
Local Food in Early Spring
We made it through the winter with plenty of local food still in tact. It's not December and January that concern me when planning how to stock our larder, but late February and, especially, March. Even the beginning of April is rough in that time between last year's preserves and new greens popping out of the ground. We managed to store own our pumpkins and garlic all winter on a wooden, open-slatted rack in the basement, my preserve pantry is still bursting with pickles, jams, and canned fruits, and for the first time I've kept up with working through the food in our upright basement freezer (see, the time I spent creating an inventory checklist to hang on the freezer door wasn't for naught.) This year we've also continued to support farmers we know that grow spinach all winter in hoophouses and have frozen local meats and poultry. I love the challenge of putting together a locally sourced meal in the depths of late winter and early spring. But enough talk about winter, that's in the past. Now the garden displays tiny rows of green sprouts soon to be salad mix and mustard greens and the red and golden beets finally showed themselves yesterday. Even though the news season's veggies are in sight, I am cooking the memories of last fall. I haven't shared any recipes lately so I wanted to post a couple that I've made recently.
Plan ahead to forage for wild grape leaves this spring. June is the ideal time, before the leaves get too big and tough. I found these along a pathway near the lake.
Stuffed Grape Leaves
Serves 8
Adapted from Nourishing Traditions by Sally Fallon. This recipe and more details about wild foraging will be featured in my column in the May issue of the Outpost Exchange magazine (see "Links I Like" for more.)
 About 3 dozen grape leaves, home pickled (see recipe to follow) or store bought, preserved in brine
1 lb. ground pastured lamb
3 large onions, peeled and finely chopped
4 T. grapeseed oil
2 c. cooked brown rice or bulgur wheat
1 c. fresh dill or 1/2 c. dried dill
1/2 c. fresh parsley, chopped
1 bunch green onions or chives, chopped
 3 T. toasted pine nuts
Juice and zest of 2 lemons
salt and pepper to taste
Spread grape leaves on paper towels to drain. In a skillet over medium-high heat, cook lamb thoroughly and set aside. Saute onions in oil until soft. Remove from heat and stir in remaining ingredients plus lamb. Place the grape leaves on a board, shiny sides down, and put 1-2 T. rice mixture in the center of each leaf. Fold the sides of the leaves to the center, then roll them up tightly, starting from the stem end. Place in a bamboo steamer or other steamer basket and steam for 30 min. Serve with lemon wedges and yogurt sauce.
Preserved Grape Leaves
Yields 1 pint
Recipe from the Wisconsin Safe Food Preservation Series from the UW-Extension
About 3 dozen tender, light-green grape leaves, stemmed
2 t. canning and pickling salt
4 c. water
1 c. water plus 1/4 c. bottled lemon juice
 Measure 2 t. salt and 4 c. water into a large saucepan, and bring to a boil. Add grape leaves, and blanch them for 30 seconds. Drain. Stack the leaves in small piles of about 6 each, and roll the stacks loosely from the side. Pack into a clean, hot pint home canning jar, folding the ends over if necessary. In a small saucepan, bring to a boil 1 c. water and 1/4 c. lemon juice. Pour the hot liquid over the rolled leaves, leaving 1/2-inch headspace. Remove bubbles with a rubber spatula. Wipe jar rim with a clean, damp cloth. Cap jar with a pretreated lid. Adjust lid. Process in a boiling water bath canner for 15 minutes for pints.
Note: These leaves are not salty and will not have to be rinsed before stuffing. If you choose not to process, keep them in your fridge after they've cooled.
Our neighbor dropped off a grocery bag of Jerusalem artichokes (a.k.a. sunchokes) last night. They grow at their cottage and she gave me some a few years ago. I planted them in our yard not realizing how prolific (and potentially invasive) they can be. They are native--related to sunflowers--but can still take over in an unhealthy way. Last spring I harvested about 12 pounds from a tiny corner of our yard, but vowed not to let them grow back. I don't see any new growth this year so I think I managed to finally eradicate them. Of course, now I miss them. I may end up planting one or two from this special delivery.
Roast Chicken with Jerusalem Artichokes, Celeriac, and Tarragon White Wine Sauce
Serves 4-6 with leftovers
Adapted from the MACSAC cookbook From Asparagus to Zucchini: A Guide to Cooking Farm Fresh Seasonal Produce
 a 4-lb. local chicken
salt and freshly ground pepper
several sprigs fresh tarragon
4-6 cloves garlic, peeled
2-3 T. butter, well softened
1/2-2/3 lbs. Jerusalem artichokes, scrubbed and cut into chunks
1/2 lb. celeriac, peeled and cut into chunks
1/2-2/3 c. dry white wine
1 T. chopped fresh tarragon
1/2 c. half-and-half or 1/4 c. water mixed with 1 T. flour (optional)
Rinse bird inside and out with cold water; pat dry with paper towels inside and out, then let stand until it comes to room temp., about 1 hour. Heat oven to 450 degrees. Sprinkle chicken generously inside and out with salt and pepper. Tuck tarragon sprigs and garlic inside the body cavity. Spread butter all over outside of bird (be sure to get some under the skin too.) Place chicken in a roasting pan just big enough to hold it and the vegetables (but don't add veggies yet.) Place it in the oven with legs toward the back of the oven. Roast 20-30 min., then baste and scatter the vegetables around it, coating them with pan drippings. Continue to roast the chicken with the legs toward the back, basting every 20-30 min. After each basting you may also, if desired, turn the chicken in the pan a quarter-turn to brown all sides. It will take a total of about 1 1/2 hours to get it nice and brown and fully cooked. Remove from pan and let it rest on a cutting board. Let the veggies and pan drippings stand for 5-10 min., then skim off excess fat. Add wine and chopped tarragon and simmer 10 min. Serve the sauce as is, enrich with cream, or thicken it with the water/flour mixture. Carve and serve with the veggies and sauce. Enjoy with a bottle of cold white wine.
Plan ahead to forage for wild grape leaves this spring. June is the ideal time, before the leaves get too big and tough. I found these along a pathway near the lake.
Stuffed Grape Leaves
Serves 8
Adapted from Nourishing Traditions by Sally Fallon. This recipe and more details about wild foraging will be featured in my column in the May issue of the Outpost Exchange magazine (see "Links I Like" for more.)
 About 3 dozen grape leaves, home pickled (see recipe to follow) or store bought, preserved in brine
1 lb. ground pastured lamb
3 large onions, peeled and finely chopped
4 T. grapeseed oil
2 c. cooked brown rice or bulgur wheat
1 c. fresh dill or 1/2 c. dried dill
1/2 c. fresh parsley, chopped
1 bunch green onions or chives, chopped
 3 T. toasted pine nuts
Juice and zest of 2 lemons
salt and pepper to taste
Spread grape leaves on paper towels to drain. In a skillet over medium-high heat, cook lamb thoroughly and set aside. Saute onions in oil until soft. Remove from heat and stir in remaining ingredients plus lamb. Place the grape leaves on a board, shiny sides down, and put 1-2 T. rice mixture in the center of each leaf. Fold the sides of the leaves to the center, then roll them up tightly, starting from the stem end. Place in a bamboo steamer or other steamer basket and steam for 30 min. Serve with lemon wedges and yogurt sauce.
Preserved Grape Leaves
Yields 1 pint
Recipe from the Wisconsin Safe Food Preservation Series from the UW-Extension
About 3 dozen tender, light-green grape leaves, stemmed
2 t. canning and pickling salt
4 c. water
1 c. water plus 1/4 c. bottled lemon juice
 Measure 2 t. salt and 4 c. water into a large saucepan, and bring to a boil. Add grape leaves, and blanch them for 30 seconds. Drain. Stack the leaves in small piles of about 6 each, and roll the stacks loosely from the side. Pack into a clean, hot pint home canning jar, folding the ends over if necessary. In a small saucepan, bring to a boil 1 c. water and 1/4 c. lemon juice. Pour the hot liquid over the rolled leaves, leaving 1/2-inch headspace. Remove bubbles with a rubber spatula. Wipe jar rim with a clean, damp cloth. Cap jar with a pretreated lid. Adjust lid. Process in a boiling water bath canner for 15 minutes for pints.
 Note: These leaves are not salty and will not have to be rinsed before stuffing. If you choose not to process, keep them in your fridge after they've cooled.
Our neighbor dropped off a grocery bag of Jerusalem artichokes (a.k.a. sunchokes) last night. They grow at their cottage and she gave me some a few years ago. I planted them in our yard not realizing how prolific (and potentially invasive) they can be. They are native--related to sunflowers--but can still take over in an unhealthy way. Last spring I harvested about 12 pounds from a tiny corner of our yard, but vowed not to let them grow back. I don't see any new growth this year so I think I managed to finally eradicate them. Of course, now I miss them. I may end up planting one or two from this special delivery.
Roast Chicken with Jerusalem Artichokes, Celeriac, and Tarragon White Wine Sauce
Serves 4-6 with leftovers
Adapted from the MACSAC cookbook From Asparagus to Zucchini: A Guide to Cooking Farm Fresh Seasonal Produce
 a 4-lb. local chicken
salt and freshly ground pepper
several sprigs fresh tarragon
4-6 cloves garlic, peeled
2-3 T. butter, well softened
1/2-2/3 lbs. Jerusalem artichokes, scrubbed and cut into chunks
1/2 lb. celeriac, peeled and cut into chunks
1/2-2/3 c. dry white wine
1 T. chopped fresh tarragon
1/2 c. half-and-half or 1/4 c. water mixed with 1 T. flour (optional)
Rinse bird inside and out with cold water; pat dry with paper towels inside and out, then let stand until it comes to room temp., about 1 hour. Heat oven to 450 degrees. Sprinkle chicken generously inside and out with salt and pepper. Tuck tarragon sprigs and garlic inside the body cavity. Spread butter all over outside of bird (be sure to get some under the skin too.) Place chicken in a roasting pan just big enough to hold it and the vegetables (but don't add veggies yet.) Place it in the oven with legs toward the back of the oven. Roast 20-30 min., then baste and scatter the vegetables around it, coating them with pan drippings. Continue to roast the chicken with the legs toward the back, basting every 20-30 min. After each basting you may also, if desired, turn the chicken in the pan a quarter-turn to brown all sides. It will take a total of about 1 1/2 hours to get it nice and brown and fully cooked. Remove from pan and let it rest on a cutting board. Let the veggies and pan drippings stand for 5-10 min., then skim off excess fat. Add wine and chopped tarragon and simmer 10 min. Serve the sauce as is, enrich with cream, or thicken it with the water/flour mixture. Carve and serve with the veggies and sauce. Enjoy with a bottle of cold white wine.
4.10.2010
Charcuterie School


 It's Saturday night and I just spent two hours "in class." I attended Charcuterie School at Bolzano Artisan Meats, Wisconsin's first dry-cured meat company. I'm reminded of my 23rd birthday when I spent the evening learning about food preservation at a local community center. My friends never let me hear the end of that one, "I can't believe you're going to a canning class on your birthday!" Well, I'm now in my eighth season of teaching food preservation classes. Does checking out this class tonight mean I'm destined to become a meat artist? Hmm, I'll stick to sausagemaking for now. But it was a totally worthwhile continuing education session, which is part of my plan as an urban homesteader--to seek out the people who practice these valuable skills and learn from them. Bolzano, named after a city in Italy, gets its pork from a small family farmer in Lake Geneva who raises Hereford heritage breed hogs. After seeing Food Inc. the other night, it was refreshing to know that this farmer raises just 40-50 hogs on average and that Bolzano has simply two coolers and a very small (not to mention impeccably clean) kitchen for processing their meats. It's the epitome of Slow Food. Currently they are curing speck, a type of proscuitto that's cold smoked after drying. Local folks have pre-ordered these hams for around $300 a pop. After tasting some of Bolzano's products I can understand why one would pay so much for this meat--delicious and very high quality...and it can easily be traced back to its source.


 This afternoon I made Vera a "Woodland Elf Hat" from a pattern I found in Bend the Rules Sewing by Amy Karol. I found a piece of pink denim in my craft cupboard that I thought would be perfect. When I unfolded the fabric I remembered it from a past thrifting adventure. It had a different flower screenprinted on each corner. I worked each of these designs into the pattern and sewed it all together fairly quickly. It's a little big on Vera, but still very cute. She'll look like a little wood sprite when she grows into it.
4.06.2010
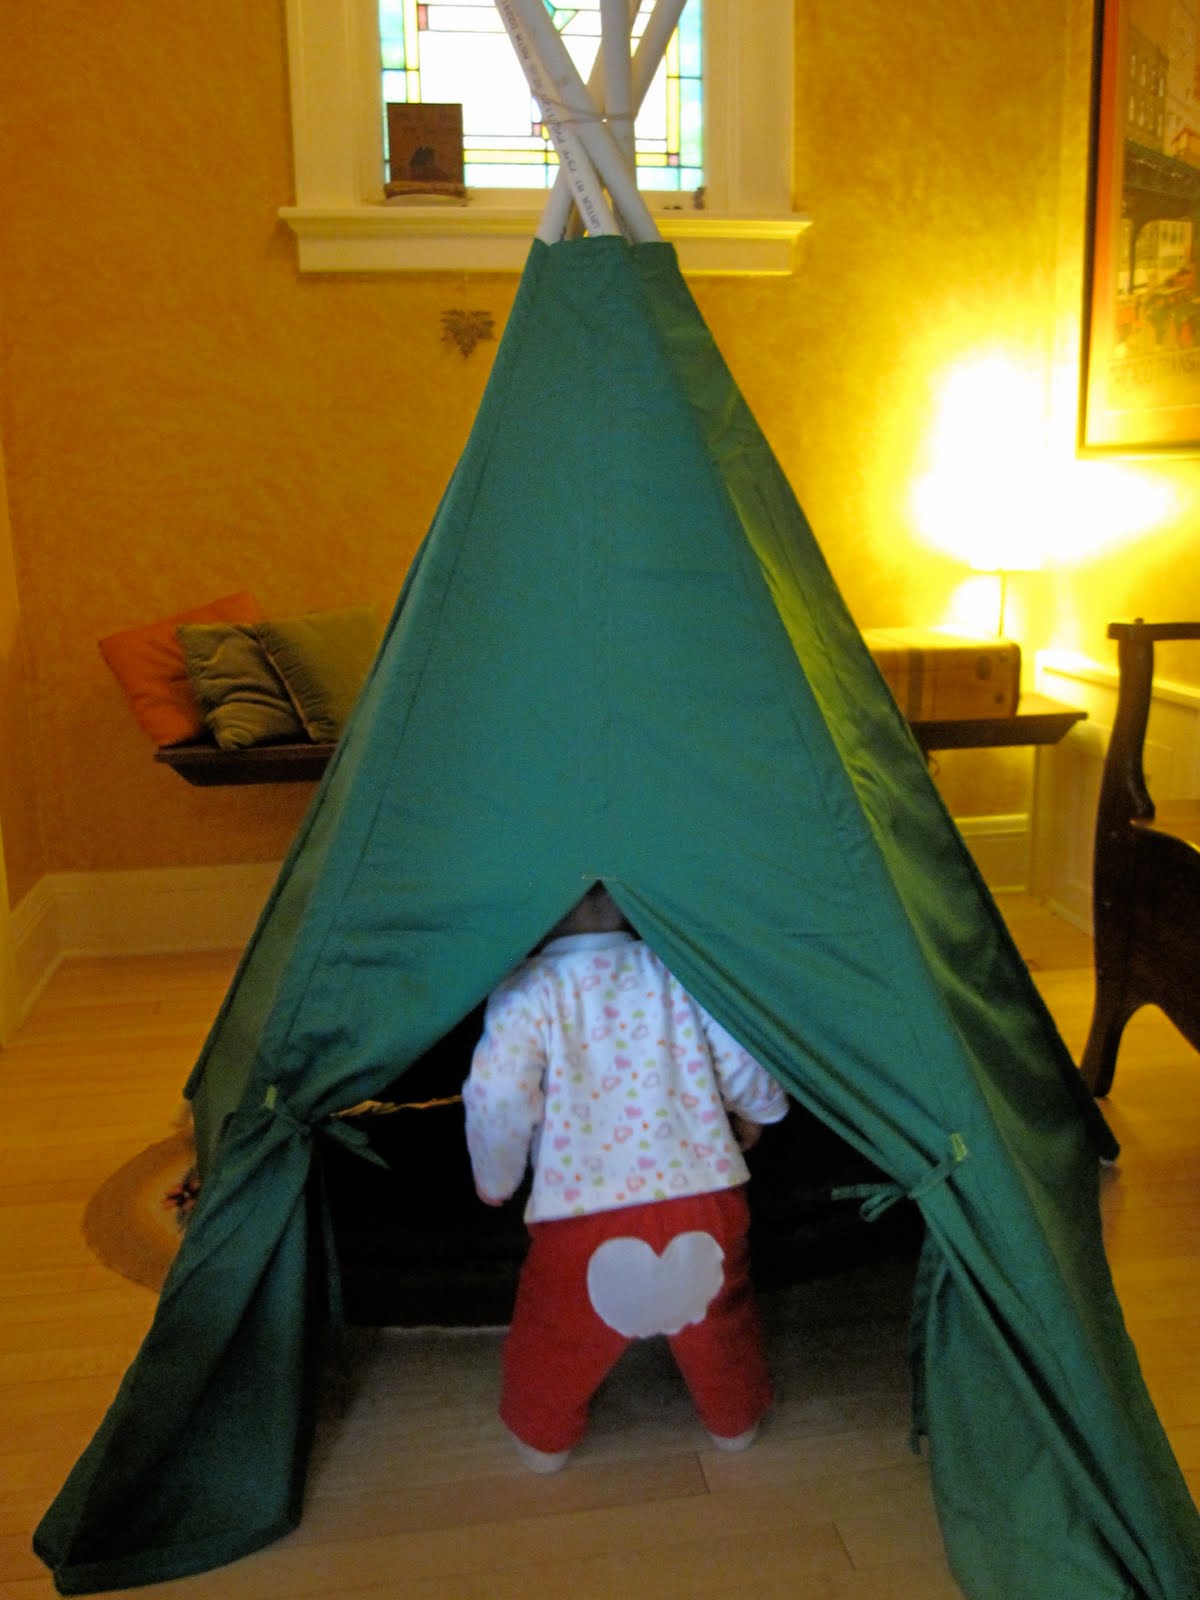
Hiding Places


4.05.2010
Spring Cleaning

 There's a small window of time to get things cleaned up in the yard and garden from winter and get seeds planted and the yard arranged for the next growing season. The weekends are precious. Currently I've got a pile of untreated lumber staring at me, ready to become our new raised beds for vegetables. Today I had a friend and neighbor, a former hobby orchardist, help us prune our cherry tree. He helped last year as well and I felt like I learned the very very basics of tree pruning so I did a little bit of pre-trimming before he arrived. I quickly learned there was so much more to shape up when he returned. Our main goal was to consolidate to one central leader. It would be a dramatic, but beneficial chop. After we removed that limb he cleaned up the rest of the tree to get lots of sunlight through the branches and create three definite tiers of growth. I should mention that this gentleman is a bonsai expert as well. He doesn't have a big yard to grow fruit trees anymore so his deck has rows and rows of beautiful, precisely pruned mini trees. It's fun to watch him prune a larger tree in the same manner--he approaches with his loppers and pruners as a painter would a canvas with paint and brush. The tree is now refreshed, looking happy and able to breathe. We also took a peek at the two dwarf apple trees I have on the fence line that I'm training to grow espalier style (on a single plane). One of the best things about pruning fruit trees, or any tree for that matter, is that it produces lots of great branches and small limbs that can be used to make trellises and bean teepees.
Along with this spring cleaning, I straightened up my craft area in the basement this weekend. A rainy Saturday made a great day for thrifting. My latest find, thrift store wise, is a place on the southside where I can find tons of inexpensive fabric. The little lady that runs the place told me to fill a paper grocery bag for $5. Can't beat that. When I got settled at home I reorganized my fabric cabinet. I don't know what's more fun, using the fabric or putting it into stacks of gradient colors. I've enjoyed organizing my craft supplies since I was a kid and would play with my moms beautifully colored spools of thread (many wooden spools at that time), putting them into straight rows and pretending they were kids going to day camp. The taller spools were the adults and camp counselors, of course. Anyway, as I was restacking the various colors and textures of fabric I got ideas for new projects--dresses for Vera, quilts, accessories for myself. Sometimes just being in my craft area and getting things together is enough to refresh and motivate me.
Tonight I attended our monthly Holistic Moms Network meeting where we watched the film Food Inc. I recommend it to anyone who cares about food, and especially to those who don't think much about what they eat. This is an eye opening movie. Even if I'd already heard most of it, it got me fired up again to take a stand for good, safe, healthy food for all. To get involved go to takepart.com
Subscribe to:
Posts (Atom)